当前我们有使用OpenNI2 SDK读取彩色流、深度流、红外流以及生成点云和生成ONI视频文件和读取ONI视频文件的示例代码,会在下面进行详细的描述。以下sample在提供的不同平台SDK对应的Samples目录下,您可以使用CMake来生成Windows下的Samples.sln解决方案及Linux下的可执行文件,或通过android studio查看Sample-android示例。Windows和Linux下Sample编译方法,请参考Samples目录下的Readme文档。
Windows,Linux示例清单
| 名称 | 系统 | 语言 | 描述 |
| ColorReaderPoll | Windows/Linux | C++ | 此示例演示了如何通过轮询方式读取彩色流。 |
| ColorReaderEvent | Windows/Linux | C++ | 此示例演示了如何通过事件方式读取彩色流。 |
| ColorReaderUVC | Windows/Linux | C++ | 此示例演示了如何通过UVC方式读取彩色流。 |
| DepthReaderPoll | Windows/Linux | C++ | 此示例演示了如何通过轮询方式读取深度流。 |
| DepthReaderEvent | Windows/Linux | C++ | 此示例演示了如何通过事件方式读取深度流。 |
| InfraredReaderPoll | Windows/Linux | C++ | 此示例演示了如何通过轮询方式读取红外流。 |
| InfraredReaderEvent | Windows/Linux | C++ | 此示例演示了如何通过事件方式读取红外流。 |
| GeneratePointCloud | Windows/Linux | C++ | 此示例演示了如何通过深度帧数据生成点云。 |
| InfraredOniFileRecorder | Windows/Linux | C++ | 此示例演示了如何将近红外流保存成Oni的文件。 |
| InfraredOniFileReader | Windows/Linux | C++ | 此示例演示了如何读取近红外流的Oni的文件。 |
| MultiDepthViewer | Windows/Linux | C++ | 此示例用于演示如何获取多个 模组 的深度数据, 并用图形方式将其显示在屏幕。可通过数字按键方式切换不同设备来查看对应设备的深度图。 |
| SimpleViewer | Windows/Linux | C++ | 此示例用于演示如何基于 OpenGL 的图形程序来打开设备,创建深度和彩色流,并同时显示深度图和彩色图,将深度数据直方图化,并用图形方式显示出来,支持切换HardwareD2C和SoftD2C功能。 |
| ExtendedAPI | Windows/Linux | C++ | 此示例用于演示如何使用扩展指令,实现读取序列号、获取设备类型,闪光灯保存,获取和设置摄像机参数,红外设置,LDP控制,LDM模块等功能。 |
| | | |
以上各示例具体代码,请查看对应平台SDK发布目录的samples目录下的samples目录,下面简单展示几个数据流获取的过程。
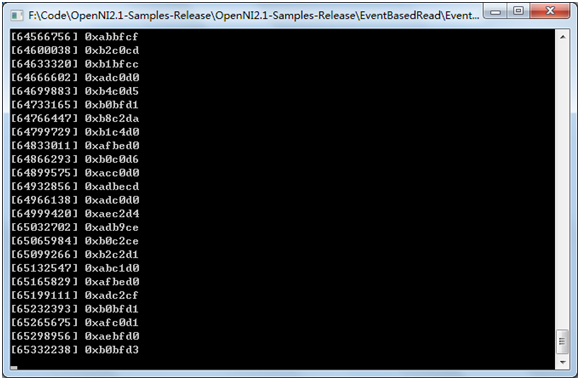
ColorReaderPoll
此示例用于说明如何通过轮询方式使用 OpenNI2 SDK 读取彩色流。
预期输出
代码概述
首先,我们加入头文件。
下一步,我们需初始化OpenNI2 SDK,获取传感器并创建读取器以读取颜色流。
Status rc = OpenNI::initialize();
if (rc != STATUS_OK)
{
printf("Initialize failed\n%s\n", OpenNI::getExtendedError());
return 1;
}
Device device;
rc = device.open(ANY_DEVICE);
if (rc != STATUS_OK)
{
printf("Couldn't open device\n%s\n", OpenNI::getExtendedError());
return 2;
}
VideoStream color;
if (device.getSensorInfo(SENSOR_COLOR) != NULL)
{
rc = color.create(device, SENSOR_COLOR);
if (rc != STATUS_OK)
{
printf("Couldn't create depth stream\n%s\n", OpenNI::getExtendedError());
return 3;
}
}
rc = color.start();
if (rc != STATUS_OK)
{
printf("Couldn't start the depth stream\n%s\n", OpenNI::getExtendedError());
return 4;
}
现在,我们一起看如何获取彩色流数据帧。
VideoFrameRef frame;
RGB888Pixel* pColor;
while (!wasKeyboardHit())
{
int changedStreamDummy;
VideoStream* pStream = &color;
rc = OpenNI::waitForAnyStream(&pStream, 1, &changedStreamDummy, SAMPLE_READ_WAIT_TIMEOUT);
if (rc != STATUS_OK)
{
printf("Wait failed! (timeout is %d ms)\n%s\n", SAMPLE_READ_WAIT_TIMEOUT, OpenNI::getExtendedError());
continue;
}
rc = color.readFrame(&frame);
if (rc != STATUS_OK)
{
printf("Read failed!\n%s\n", OpenNI::getExtendedError());
continue;
}
if (frame.getVideoMode().getPixelFormat() != PIXEL_FORMAT_RGB888)
{
printf("Unexpected frame format\n");
continue;
}
int middleIndex = (frame.getHeight() + 1)*frame.getWidth() / 2;
pColor = (RGB888Pixel*)frame.getData();
printf("[%08llu] 0x%02x%02x%02x\n", (long long)frame.getTimestamp(),
pColor[middleIndex].r&0xff,
pColor[middleIndex].g&0xff,
pColor[middleIndex].b&0xff);
}
最后,我们需要释放所有资源。
color.stop();
color.destroy();
device.close();
OpenNI::shutdown();
ColorReaderEvent
此示例演示了如何通过事件方式使用 OpenNI2 SDK 读取彩色流。
预期输出
代码概述
首先,我们加入头文件。
下一步,我们需初始化 OpenNI2 SDK,获取传感器并创建读取器以读取彩色流
Status rc = OpenNI::initialize();
if (rc != STATUS_OK)
{
printf("Initialize failed\n%s\n", OpenNI::getExtendedError());
return 1;
}
Device device;
rc = device.open(ANY_DEVICE);
if (rc != STATUS_OK)
{
printf("Couldn't open device\n%s\n", OpenNI::getExtendedError());
return 2;
}
VideoStream color;
if (device.getSensorInfo(SENSOR_COLOR) != NULL)
{
rc = color.create(device, SENSOR_COLOR);
if (rc != STATUS_OK)
{
printf("Couldn't create depth stream\n%s\n", OpenNI::getExtendedError());
}
}
rc = color.start();
if (rc != STATUS_OK)
{
printf("Couldn't start the depth stream\n%s\n", OpenNI::getExtendedError());
}
然后,我们注册一个回调来接收彩色流数据帧。
void analyzeFrame(const VideoFrameRef& frame)
{
RGB888Pixel* pColor;
int middleIndex = (frame.getHeight()+1)*frame.getWidth()/2;
switch (frame.getVideoMode().getPixelFormat())
{
case PIXEL_FORMAT_RGB888:
pColor = (RGB888Pixel*)frame.getData();
printf("[%08llu] 0x%02x%02x%02x\n", (long long)frame.getTimestamp(),
pColor[middleIndex].r&0xff,
pColor[middleIndex].g&0xff,
pColor[middleIndex].b&0xff);
break;
default:
printf("Unknown format\n");
}
}
class PrintCallback : public VideoStream::NewFrameListener
{
public:
void onNewFrame(VideoStream& stream)
{
stream.readFrame(&m_frame);
analyzeFrame(m_frame);
}
private:
VideoFrameRef m_frame;
};
PrintCallback colorPrinter;
color.addNewFrameListener(&colorPrinter);
接下来这里需要调用更新。
while (!wasKeyboardHit())
{
Sleep(100);
}
一旦我们不再需要接收帧,请注销回调。
color.removeNewFrameListener(&colorPrinter);
最后,我们需要释放所有资源。
color.stop();
color.destroy();
device.close();
OpenNI::shutdown();
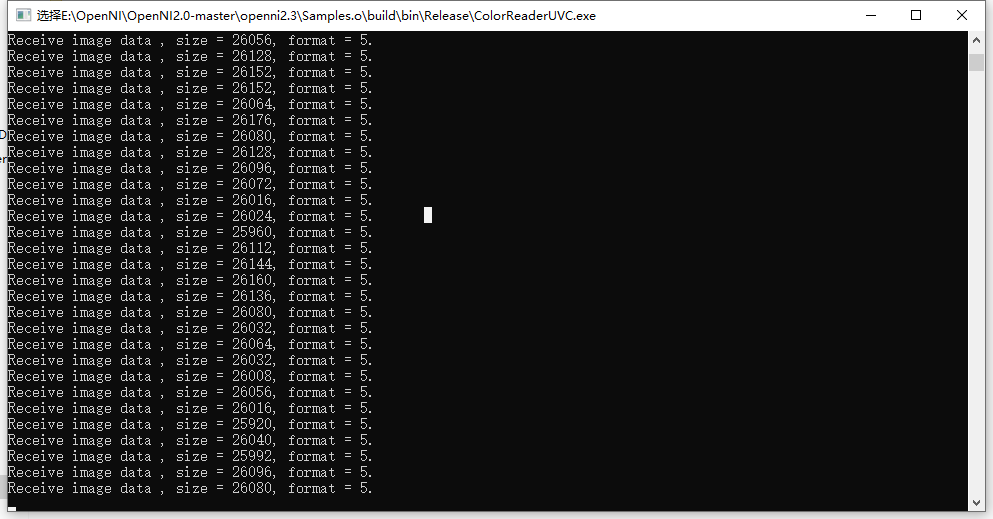
ColorReaderUVC
概述
此示例演示了如何使用 OpenCV来打开UVC 协议的彩色摄像头并读取彩色流。
预期输出
代码概述
OpenNI2 SDK当前不支持标准UVC协议的彩色摄像头,所以我们提供了基于OpenCV中的封装的UVCSwapper类来访问UVC彩色摄像头的方法。
首先,我们加入头文件。
#include "OniSampleUtilities.h"
#include "UVC_Swapper.h"
#include "UVCSwapper.h"
#include "OBTypes.h"
#include "ObCommon.h"
可以设置视频输出YUV422和MJPEG编码格式及分辨率。
int main()
{
UVC_Swapper uvsSwapper;
uvsSwapper.UvcInit();
bool mStart = false;
uvsSwapper.UVCStreamStart(IMAGE_WIDTH_640, IMAGE_HEIGHT_480, OB_PIXEL_FORMAT_MJPEG);
mStart = true;
uint8_t* mUvcBuff = new uint8_t[IMAGE_WIDTH_640*IMAGE_HEIGHT_480 * 2];
while (!wasKeyboardHit() && mStart)
{
uint32_t nSize = 0;
uint32_t nImageType = 0;
memset(mUvcBuff, 0, IMAGE_WIDTH_640*IMAGE_HEIGHT_480 * 2);
int mRet = uvsSwapper.WaitUvcStream(mUvcBuff, nSize, nImageType, UVC_TIME_OUT);
if (mRet != CAMERA_STATUS_SUCCESS)
{
return mRet;
}
else
{
printf("Receive image data , size = %d, format = %d.\n", nSize, nImageType);
}
}
uvsSwapper.UVCStreamStop();
uvsSwapper.UvcDeInit();
if (mUvcBuff != NULL)
{
delete mUvcBuff;
mUvcBuff = NULL;
}
return 0;
}
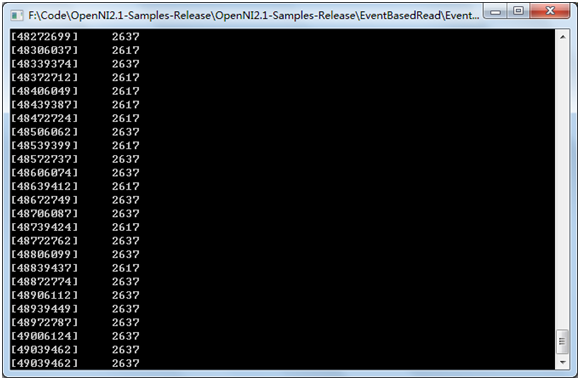
DepthReaderPoll
概述
此示例用于说明如何通过轮询方式使用 OpenNI2 SDK 读取深度流。
预期输出
代码概述
首先,我们加入头文件。
下一步,我们需初始化 OpenNI2 SDK,获取传感器并创建读取器以读取深度流。
Status rc = OpenNI::initialize();
if (rc != STATUS_OK)
{
printf("Initialize failed\n%s\n", OpenNI::getExtendedError());
return 1;
}
Device device;
rc = device.open(ANY_DEVICE);
if (rc != STATUS_OK)
{
printf("Couldn't open device\n%s\n", OpenNI::getExtendedError());
return 2;
}
VideoStream depth;
if (device.getSensorInfo(SENSOR_DEPTH) != NULL)
{
rc = depth.create(device, SENSOR_DEPTH);
if (rc != STATUS_OK)
{
printf("Couldn't create depth stream\n%s\n", OpenNI::getExtendedError());
return 3;
}
}
rc = depth.start();
if (rc != STATUS_OK)
{
printf("Couldn't start the depth stream\n%s\n", OpenNI::getExtendedError());
return 4;
}
现在,我们一起看如何获取深度流数据帧。
VideoFrameRef frame;
while (!wasKeyboardHit())
{
int changedStreamDummy;
VideoStream* pStream = &depth;
rc = OpenNI::waitForAnyStream(&pStream, 1, &changedStreamDummy, SAMPLE_READ_WAIT_TIMEOUT);
if (rc != STATUS_OK)
{
printf("Wait failed! (timeout is %d ms)\n%s\n", SAMPLE_READ_WAIT_TIMEOUT, OpenNI::getExtendedError());
continue;
}
rc = depth.readFrame(&frame);
if (rc != STATUS_OK)
{
printf("Read failed!\n%s\n", OpenNI::getExtendedError());
continue;
}
if (frame.getVideoMode().getPixelFormat() != PIXEL_FORMAT_DEPTH_1_MM && frame.getVideoMode().getPixelFormat() != PIXEL_FORMAT_DEPTH_100_UM)
{
printf("Unexpected frame format\n");
continue;
}
int middleIndex = (frame.getHeight() + 1)*frame.getWidth() / 2;
printf("[%08llu] %8d\n", (long long)frame.getTimestamp(), pDepth[middleIndex]);
}
最后,我们需要释放所有资源。
depth.stop();
depth.destroy();
device.close();
OpenNI::shutdown();
DepthReaderEvent
概述
此示例演示了如何通过事件方式使用 OpenNI2 SDK 读取深度流。
预期输出
代码概述
首先,我们加入头文件。
下一步,我们需初始化 OpenNI2 SDK,获取传感器并创建读取器以读取深度流。
Status rc = OpenNI::initialize();
if (rc != STATUS_OK)
{
printf("Initialize failed\n%s\n", OpenNI::getExtendedError());
return 1;
}
Device device;
rc = device.open(ANY_DEVICE);
if (rc != STATUS_OK)
{
printf("Couldn't open device\n%s\n", OpenNI::getExtendedError());
return 2;
}
VideoStream depth;
if (device.getSensorInfo(SENSOR_DEPTH) != NULL)
{
rc = depth.create(device, SENSOR_DEPTH);
if (rc != STATUS_OK)
{
printf("Couldn't create depth stream\n%s\n", OpenNI::getExtendedError());
}
}
rc = depth.start();
if (rc != STATUS_OK)
{
printf("Couldn't start the depth stream\n%s\n", OpenNI::getExtendedError());
}
然后,我们注册一个回调来接收深度流数据帧。
void analyzeFrame(const VideoFrameRef& frame)
{
int middleIndex = (frame.getHeight()+1)*frame.getWidth()/2;
switch (frame.getVideoMode().getPixelFormat())
{
case PIXEL_FORMAT_DEPTH_1_MM:
case PIXEL_FORMAT_DEPTH_100_UM:
printf("[%08llu] %8d\n", (long long)frame.getTimestamp(),
pDepth[middleIndex]);
break;
default:
printf("Unknown format\n");
}
}
class PrintCallback : public VideoStream::NewFrameListener
{
public:
void onNewFrame(VideoStream& stream)
{
stream.readFrame(&m_frame);
analyzeFrame(m_frame);
}
private:
VideoFrameRef m_frame;
};
PrintCallback depthPrinter;
depth.addNewFrameListener(&depthPrinter);
接下来这里需要调用更新。
while (!wasKeyboardHit())
{
Sleep(100);
}
一旦我们不再需要接收帧,请注销回调。
depth.removeNewFrameListener(&depthPrinter);
最后,我们需要释放所有资源。
depth.stop();
depth.destroy();
device.close();
OpenNI::shutdown();
InfraredReaderPoll
概述
此示例用于说明如何通过轮询方式使用 OpenNI2 SDK 读取红外流。
预期输出
代码概述
首先,我们加入头文件。
下一步,我们需初始化OpenNI2 SDK,获取传感器并创建读取器以读取红外流。
Status rc = OpenNI::initialize();
if (rc != STATUS_OK)
{
printf("Initialize failed\n%s\n", OpenNI::getExtendedError());
return 1;
}
Device device;
rc = device.open(ANY_DEVICE);
if (rc != STATUS_OK)
{
printf("Couldn't open device\n%s\n", OpenNI::getExtendedError());
return 2;
}
VideoStream ir;
if (device.getSensorInfo(SENSOR_IR) != NULL)
{
rc = ir.create(device, SENSOR_IR);
if (rc != STATUS_OK)
{
printf("Couldn't create ir stream\n%s\n", OpenNI::getExtendedError());
return 3;
}
}
rc = ir.start();
if (rc != STATUS_OK)
{
printf("Couldn't start the ir stream\n%s\n", OpenNI::getExtendedError());
return 4;
}
现在,我们一起看如何获取红外流数据帧。
VideoFrameRef frame;
while (!wasKeyboardHit())
{
int changedStreamDummy;
VideoStream* pStream = &ir;
rc = OpenNI::waitForAnyStream(&pStream, 1, &changedStreamDummy, SAMPLE_READ_WAIT_TIMEOUT);
if (rc != STATUS_OK)
{
printf("Wait failed! (timeout is %d ms)\n%s\n", SAMPLE_READ_WAIT_TIMEOUT, OpenNI::getExtendedError());
continue;
}
rc = ir.readFrame(&frame);
if (rc != STATUS_OK)
{
printf("Read failed!\n%s\n", OpenNI::getExtendedError());
continue;
}
if (frame.getVideoMode().getPixelFormat() != PIXEL_FORMAT_GRAY16)
{
printf("Unexpected frame format\n");
continue;
}
int middleIndex = (frame.getHeight() + 1)*frame.getWidth() / 2;
printf("[%08llu] %8d\n", (long long)frame.getTimestamp(), pIr[middleIndex]);
}
最后,我们需要释放所有资源。
ir.stop();
ir.destroy();
device.close();
OpenNI::shutdown();
InfraredReaderEvent
概述
此示例演示了如何通过事件方式使用 OpenNI2 SDK 读取红外流。
预期输出
代码概述
首先,我们加入头文件。
下一步,我们需初始化 OpenNI2 SDK,获取传感器并创建读取器以读取红外流。
Status rc = OpenNI::initialize();
if (rc != STATUS_OK)
{
printf("Initialize failed\n%s\n", OpenNI::getExtendedError());
return 1;
}
Device device;
rc = device.open(ANY_DEVICE);
if (rc != STATUS_OK)
{
printf("Couldn't open device\n%s\n", OpenNI::getExtendedError());
return 2;
}
VideoStream ir;
if (device.getSensorInfo(SENSOR_IR) != NULL)
{
rc = ir.create(device, SENSOR_IR);
if (rc != STATUS_OK)
{
printf("Couldn't create ir stream\n%s\n", OpenNI::getExtendedError());
}
}
rc = ir.start();
if (rc != STATUS_OK)
{
printf("Couldn't start the ir stream\n%s\n", OpenNI::getExtendedError());
}
然后,我们注册一个回调来接收红外流数据帧。
void analyzeFrame(const VideoFrameRef& frame)
{
int middleIndex = (frame.getHeight()+1)*frame.getWidth()/2;
switch (frame.getVideoMode().getPixelFormat())
{
case PIXEL_FORMAT_GRAY16:
printf("[%08llu] %8d\n", (long long)frame.getTimestamp(),
pIR[middleIndex]);
break;
default:
printf("Unknown format\n");
}
}
class PrintCallback : public VideoStream::NewFrameListener
{
public:
void onNewFrame(VideoStream& stream)
{
stream.readFrame(&m_frame);
analyzeFrame(m_frame);
}
private:
VideoFrameRef m_frame;
};
PrintCallback irPrinter;
ir.addNewFrameListener(&irPrinter);
接下来这里需要调用更新。
while (!wasKeyboardHit())
{
Sleep(100);
}
一旦我们不再需要接收帧,请注销回调。
ir.removeNewFrameListener(&irPrinter);
最后,我们需要释放所有资源。
ir.stop();
ir.destroy();
device.close();
OpenNI::shutdown();
GeneratePointCloud
概述
此示例演示了如何通过深度帧数据生成点云,并将点云保存为ply的格式。该例中读取了50个深度帧,并将每个深度帧转换为点云并保存成ply格式。
预期输出
生成50个ply格式的点云文件。
代码概述
首先,我们加入头文件。
下一步,声明一个要来保存内参数据的结构体,并定义一个全局对象保存从相机获取到的内参数据。
typedef struct xnIntrinsic_Params
{
xnIntrinsic_Params() :
c_x(320.0), c_y(240.0), f_x(480.0), f_y(480.0)
{}
xnIntrinsic_Params(float c_x_, float c_y_, float f_x_, float f_y_) :
c_x(c_x_), c_y(c_y_), f_x(f_x_),f_y(f_y_)
{}
float c_x;
float c_y;
float f_x;
float f_y;
}xIntrinsic_Params;
xIntrinsic_Params g_IntrinsicParam;
下一步,我们需初始化 OpenNI2 SDK,打开设备,创建并启动深度流并获取相机内参。
Status rc = OpenNI::initialize();
if (rc != STATUS_OK)
{
printf("Initialize failed\n%s\n", OpenNI::getExtendedError());
return 1;
}
Device device;
rc = device.open(ANY_DEVICE);
if (rc != STATUS_OK)
{
printf("Couldn't open device\n%s\n", OpenNI::getExtendedError());
return 2;
}
VideoStream depth;
if (device.getSensorInfo(SENSOR_DEPTH) != NULL)
{
rc = depth.create(device, SENSOR_DEPTH);
if (rc != STATUS_OK)
{
printf("Couldn't create depth stream\n%s\n", OpenNI::getExtendedError());
}
}
rc = depth.start();
if (rc != STATUS_OK)
{
printf("Couldn't start the depth stream\n%s\n", OpenNI::getExtendedError());
}
PrintCallback depthPrinter;
depth.addNewFrameListener(&depthPrinter);
getCameraParams(device, g_IntrinsicParam);
获取相机内参的函数getCameraParams定义如下:
void getCameraParams(
openni::Device& Device, xIntrinsic_Params& IrParam)
{
OBCameraParams cameraParam;
int dataSize = sizeof(cameraParam);
memset(&cameraParam, 0, sizeof(cameraParam));
openni::Status rc = Device.
getProperty(openni::OBEXTENSION_ID_CAM_PARAMS, (uint8_t *)&cameraParam, &dataSize);
if (rc != openni::STATUS_OK)
{
return;
}
IrParam.f_x = cameraParam.l_intr_p[0];
IrParam.f_y = cameraParam.l_intr_p[1];
IrParam.c_x = cameraParam.l_intr_p[2];
IrParam.c_y = cameraParam.l_intr_p[3];
std::cout << "IrParam.f_x = " << IrParam.f_x << std::endl;
std::cout << "IrParam.f_y = " << IrParam.f_y << std::endl;
std::cout << "IrParam.c_x = " << IrParam.c_x << std::endl;
std::cout << "IrParam.c_y = " << IrParam.c_y << std::endl;
}
然后,我们注册一个回调来接收深度流数据帧,并将深度数据帧转换成点云保存。
int g_imageCount = 0;
void analyzeFrame(const VideoFrameRef& frame)
{
char plyFileName[256] = { 0 };
g_imageCount++;
sprintf_s(plyFileName, "pointcloud_%d.ply", g_imageCount);
int middleIndex = (frame.getHeight()+1)*frame.getWidth()/2;
switch (frame.getVideoMode().getPixelFormat())
{
case PIXEL_FORMAT_DEPTH_1_MM:
printf("[%08llu] %8d\n", (long long)frame.getTimestamp(),
pDepth[middleIndex]);
convertDepthToPointCloud(pDepth, frame.getWidth(), frame.getHeight(), plyFileName);
break;
default:
printf("Unknown format\n");
}
}
class PrintCallback : public VideoStream::NewFrameListener
{
public:
void onNewFrame(VideoStream& stream)
{
stream.readFrame(&m_frame);
analyzeFrame(m_frame);
}
private:
VideoFrameRef m_frame;
};
将深度帧转换为点云的方法convertDepthToPointCloud定义如下:
#define MIN_DISTANCE 20 // Unit(mm)
#define MAX_DISTANCE 4000 //Unit(mm)
#define RESOULTION_X 640.0 //calibration resolution
#define RESOULTION_Y 480.0 //calibration resolution
void convertDepthToPointCloud(const uint16_t *pDepth, int width, int height,const char *ply_filename)
{
if (NULL == pDepth)
{
printf("depth frame is NULL!");
return;
}
FILE *fp;
int res = fopen_s(&fp, ply_filename, "w");
int valid_count = 0;
uint16_t max_depth = MAX_DISTANCE;
uint16_t min_depth = MIN_DISTANCE;
int img_size = width * height;
for (int v = 0; v < height; ++v)
{
for (int u = 0; u < width; ++u)
{
uint16_t depth = pDepth[v * width + u];
if (depth <= 0 || depth < min_depth || depth > max_depth)
continue;
valid_count += 1;
}
}
fprintf(fp, "ply\n");
fprintf(fp, "format ascii 1.0\n");
fprintf(fp, "element vertex %d\n", valid_count);
fprintf(fp, "property float x\n");
fprintf(fp, "property float y\n");
fprintf(fp, "property float z\n");
fprintf(fp, "property uchar red\n");
fprintf(fp, "property uchar green\n");
fprintf(fp, "property uchar blue\n");
fprintf(fp, "end_header\n");
float world_x, world_y, world_z;
for (int v = 0; v < height; ++v)
{
for (int u = 0; u < width; ++u)
{
uint16_t depth = pDepth[v * width + u];
if (depth <= 0 || depth < min_depth || depth > max_depth)
continue;
float fdx = g_IntrinsicParam.f_x * ((float)(width) / RESOULTION_X);
float fdy = g_IntrinsicParam.f_y * ((float)(height) / RESOULTION_Y);
float u0 = g_IntrinsicParam.c_x * ((float)(width)/ RESOULTION_X);
float v0 = g_IntrinsicParam.c_y * ((float)(height) / RESOULTION_Y);
float tx = (u - u0) / fdx;
float ty = (v - v0) / fdy;
world_x = depth * tx;
world_y = depth * ty;
world_z = depth;
fprintf(fp, "%f %f %f 255 255 255\n", world_x, world_y, world_z);
}
}
fclose(fp);
}
接下来这里需要调用更新。
#define MAX_FRAME_COUNT 50
while (MAX_FRAME_COUNT > g_imageCount)
{
Sleep(100);
}
一旦我们不再需要接收帧,请注销回调。
depth.removeNewFrameListener(&depthPrinter);
最后,我们需要释放所有资源。
depth.stop();
depth.destroy();
device.close();
OpenNI::shutdown();
InfraredOniFileRecorder
概述
此示例演了如何将近红外流保存成Oni的文件,这个示例演示了读取100个IR数据帧,并将这100个IR数据帧保存成Oni格式的文件。
预期输出
生成一个名为ir.oni的文件。
代码概述
首先,我们加入头文件。
#include <iostream>
#include <iomanip>
#include <OpenNI.h>
下一步,我们需初始化 OpenNI2 SDK,打开设备,创建并启动红外流。
Status rc = OpenNI::initialize();
if (rc != STATUS_OK)
{
std::cout << "Initialize failed\n" << OpenNI::getExtendedError() << std::endl;
return rc;
}
Device device;
rc = device.open(ANY_DEVICE);
if (rc != STATUS_OK)
{
std::cout << "Couldn't open device\n" << OpenNI::getExtendedError() << std::endl;
return rc;
}
VideoStream ir;
if (device.getSensorInfo(SENSOR_IR) != NULL)
{
rc = ir.create(device, SENSOR_IR);
if (rc != STATUS_OK)
{
std::cout << "Couldn't create ir stream\n" << OpenNI::getExtendedError() << std::endl;
return rc;
}
}
rc = ir.start();
if (rc != STATUS_OK)
{
std::cout << "Couldn't start the depth stream\n" << OpenNI::getExtendedError() << std::endl;
return rc;
}
下一步,创建录制器,将IR流添加到录制器上,并且启动录制器。
Recorder recordIr;
char irPathFile[256] = { 0 };
sprintf_s(irPathFile, "ir.oni");
rc = recordIr.create(irPathFile);
if (STATUS_OK != rc)
{
std::cout << "create ir video recorder failed." << std::endl;
return rc;
}
rc = recordIr.attach(ir);
if (STATUS_OK != rc)
{
std::cout << "attach ir video recorder failed." << std::endl;
return rc;
}
rc = recordIr.start();
if (STATUS_OK != rc)
{
std::cout << "start ir video recorder failed." << std::endl;
return rc;
}
下一步,轮询方式,读取100帧数据。
VideoFrameRef frame;
int count = 0;
while (MAX_RECORD_FRAME_NUM > count)
{
int changedStreamDummy;
VideoStream* pStream = &ir;
rc = OpenNI::waitForAnyStream(&pStream, 1, &changedStreamDummy, SAMPLE_READ_WAIT_TIMEOUT);
if (rc != STATUS_OK)
{
std::cout << "Wait failed! (timeout is " << SAMPLE_READ_WAIT_TIMEOUT << "ms)\n" << OpenNI::getExtendedError();
continue;
}
rc = ir.readFrame(&frame);
if (rc != STATUS_OK)
{
std::cout << "Read failed!\n" << OpenNI::getExtendedError() << std::endl;
continue;
}
if (frame.getVideoMode().getPixelFormat() != PIXEL_FORMAT_GRAY16)
{
std::cout << "Unexpected frame format\n";
continue;
}
int middleIndex = (frame.getHeight() + 1)*frame.getWidth() / 2;
std::cout << "[" << std::setw(8) << std::setiosflags(std::ios::right) << std::setfill('0') << (long long)frame.getTimestamp() << "]" << " ";
std::cout << std::setw(8) << std::setfill(' ') << pIR[middleIndex] << std::endl;
count++;
}
最后,关闭销毁录制器及流与设备。
recordIr.stop();
recordIr.destroy();
ir.stop();
ir.destroy();
device.close();
OpenNI::shutdown();
return 0;
InfraredOniFileReader
概述
此示例演示了如何读取近红外流的Oni的文件。
预期输出
代码概述
首先,我们加入头文件。
#include <stdio.h>
#include <OpenNI.h>
下一步,我们需初始化 OpenNI2 SDK,打开文件设备ir.oni,在文件设备上创建并启动红外流。
Status rc = OpenNI::initialize();
if (rc != STATUS_OK)
{
printf("Initialize failed\n%s\n", OpenNI::getExtendedError());
return 1;
}
char irPathFile[256] = { 0 };
sprintf_s(irPathFile, "ir.oni");
Device device;
rc = device.open(irPathFile);
if (rc != STATUS_OK)
{
printf("Couldn't open device\n%s\n", OpenNI::getExtendedError());
return 2;
}
VideoStream ir;
rc = ir.create(device, SENSOR_IR);
if (rc != STATUS_OK)
{
printf("Couldn't create ir stream\n%s\n", OpenNI::getExtendedError());
return 3;
}
rc = ir.start();
if (rc != STATUS_OK)
{
printf("Couldn't start the depth stream\n%s\n", OpenNI::getExtendedError());
return 4;
}
下一步,获取回放控制对象和oni文件设备中的总帧数,并且从文件设备中根据索引读取数据帧。
for (int k = 0; k < totalFrameNum; k++)
{
irPlaybackCtrl->
seek(ir, k);
VideoFrameRef frame;
ir.readFrame(&frame);
if (frame.getVideoMode().getPixelFormat() != PIXEL_FORMAT_GRAY16)
{
printf("Unexpected frame format\n");
continue;
}
int middleIndex = (frame.getHeight() + 1)*frame.getWidth() / 2;
printf("[%08llu] %8d\n", (long long)frame.getTimestamp(), pIR[middleIndex]);
}
最后,销毁流,关闭文件设备。
ir.stop();
ir.destroy();
device.close();
OpenNI::shutdown();
Android示例清单
| 名称 | 系统 | 语言 | 描述 |
| ColorReaderPoll | Android | Java | 此示例演示了如何通过轮询方式读取彩色流。 |
| ColorReaderEvent | Android | Java | 此示例演示了如何通过事件方式读取彩色流。 |
| ColorReaderUVC | Android | Java | 此示例演示了如何通过UVC方式读取彩色流。 |
| DepthReaderPoll | Android | Java | 此示例演示了如何通过轮询方式读取深度流。 |
| DepthReaderEvent | Android | Java | 此示例演示了如何通过事件方式读取深度流。 |
| IRReaderPoll | Android | Java | 此示例演示了如何通过轮询方式读取红外流。 |
| IRReaderEvent | Android | Java | 此示例演示了如何通过事件方式读取红外流。 |
| ExtendedAPI | Android | Java | 此示例用于演示如何使用扩展指令,实现读取序列号、获取设备类型,闪光灯保存,获取和设置摄像机参数,红外设置,LDP控制,LDM模块等功能。 |
| | | |
以上各示例具体代码,请查看Android SDK发布目录的samples目录下的Samples-android工程。
ReaderPoll
概述
下面以Depth为例展示通过轮询方式获取数据流的过程,Color和IR流获取方式依次参考即可。
代码概述
SDK初始化
OpenNI.setLogMinSeverity(0);
OpenNI.setLogAndroidOutput(true);
OpenNI.initialize();
打开Device
OpenNIHelper openNIHelper = new OpenNIHelper(getApplicationContext());
openNIHelper.requestDeviceOpen(deviceOpenListener)
OpenNIHelper.DeviceOpenListener deviceOpenListener = new OpenNIHelper.DeviceOpenListener() {
@Override
public void onDeviceOpened(UsbDevice usbDevice) {
List<DeviceInfo> deviceInfos = OpenNI.enumerateDevices();
if (deviceInfos.size() == 0) {
Toast.makeText(BaseActivity.this, "Device enumeration 0!", Toast.LENGTH_SHORT).show();
return;
}
for (int i = 0; i < deviceInfos.size(); i++) {
DeviceInfo deviceInfo = deviceInfos.get(i);
if (deviceInfo.getUsbProductId() == usbDevice.getProductId()) {
try {
} catch (Exception e) {
e.printStackTrace();
Toast.makeText(BaseActivity.this, e.getMessage(), Toast.LENGTH_SHORT).show();
}
break;
}
}
createDepth(device);
}
@Override
public void onDeviceOpenFailed(String msg) {
Toast.makeText(BaseActivity.this, msg, Toast.LENGTH_SHORT).show();
}
@Override
public void onDeviceNotFound() {
Toast.makeText(BaseActivity.this, "Device not found!", Toast.LENGTH_SHORT).show();
}
};
创建Depth
private void createDepth(Device device) {
if (device != null) {
try {
this.mDepth = VideoStream.create(device, SensorType.DEPTH);
List<VideoMode> videoModes = this.mDepth.getSensorInfo().getSupportedVideoModes();
for (int j = 0; j < videoModes.size(); j++) {
VideoMode videoMode = videoModes.get(j);
if (videoMode.getResolutionX() == 640 && videoMode.getResolutionY() == 400 && videoMode.getPixelFormat() == PixelFormat.DEPTH_1_MM) {
Log.i(TAG, "Depth stream select videoMode X:" + videoMode.getResolutionX() + "Y:" + videoMode.getResolutionY() + ",PixelFormat :" + videoMode.getPixelFormat());
this.mDepth.setVideoMode(videoMode);
break;
}
}
} catch (Exception e) {
e.printStackTrace();
Toast.makeText(DepthReaderPoll.this, e.getMessage(), Toast.LENGTH_SHORT).show();
}
}
startDepth();
}
开启Depth
private void startDepth() {
if (this.mDepth == null) {
return;
}
this.isRunning = true;
streamThread = new Thread() {
@Override
public void run() {
List<VideoStream> streams = new ArrayList<>();
streams.add(mDepth);
mDepth.start();
while (isRunning) {
try {
OpenNI.waitForAnyStream(streams, 2000);
} catch (TimeoutException e) {
e.printStackTrace();
}
if (mDepth != null) {
VideoFrameRef videoFrameRef = mDepth.readFrame();
depthView.update(videoFrameRef);
videoFrameRef.release();
}
}
}
};
streamThread.start();
}
停止Depth
private void stopDepth() {
try {
this.isRunning = false;
if (streamThread != null) {
this.streamThread.join();
}
if (mDepth != null) {
mDepth.stop();
}
streamThread = null;
} catch (InterruptedException e) {
e.printStackTrace();
}
}
销毁Depth
private void destroyDepth() {
if (mDepth != null) {
mDepth.destroy();
mDepth = null;
}
}
关闭Device
public void closeDevice() {
try {
if (device != null) {
device.close();
}
} catch (Exception e) {
e.printStackTrace();
}
}
销毁SDK
public void shutDownOpenNIHelper() {
if (openNIHelper != null) {
openNIHelper.shutdown();
}
}
private void shutDownSDK(){
OpenNI.shutdown();
}
ReaderEvent
概述
下面以Depth为例展示通过事件方式获取数据流的过程,Color和IR流获取方式依次参考即可。
代码概述
SDK初始化
OpenNI.setLogMinSeverity(0);
OpenNI.setLogAndroidOutput(true);
OpenNI.initialize();
打开Device
OpenNIHelper openNIHelper = new OpenNIHelper(getApplicationContext());
openNIHelper.requestDeviceOpen(deviceOpenListener)
OpenNIHelper.DeviceOpenListener deviceOpenListener = new OpenNIHelper.DeviceOpenListener() {
@Override
public void onDeviceOpened(UsbDevice usbDevice) {
List<DeviceInfo> deviceInfos = OpenNI.enumerateDevices();
if (deviceInfos.size() == 0) {
Toast.makeText(BaseActivity.this, "Device enumeration 0!", Toast.LENGTH_SHORT).show();
return;
}
for (int i = 0; i < deviceInfos.size(); i++) {
DeviceInfo deviceInfo = deviceInfos.get(i);
if (deviceInfo.getUsbProductId() == usbDevice.getProductId()) {
try {
} catch (Exception e) {
e.printStackTrace();
Toast.makeText(BaseActivity.this, e.getMessage(), Toast.LENGTH_SHORT).show();
}
break;
}
}
createDepth(device);
}
@Override
public void onDeviceOpenFailed(String msg) {
Toast.makeText(BaseActivity.this, msg, Toast.LENGTH_SHORT).show();
}
@Override
public void onDeviceNotFound() {
Toast.makeText(BaseActivity.this, "Device not found!", Toast.LENGTH_SHORT).show();
}
};
创建Depth
private void createDepth(Device device) {
if (device != null) {
try {
this.mDepth = VideoStream.create(device, SensorType.DEPTH);
List<VideoMode> videoModes = this.mDepth.getSensorInfo().getSupportedVideoModes();
for (int j = 0; j < videoModes.size(); j++) {
VideoMode videoMode = videoModes.get(j);
if (videoMode.getResolutionX() == 640 && videoMode.getResolutionY() == 400 && videoMode.getPixelFormat() == PixelFormat.DEPTH_1_MM) {
Log.i(TAG, "Depth stream select videoMode X:" + videoMode.getResolutionX() + "Y:" + videoMode.getResolutionY() + ",PixelFormat :" + videoMode.getPixelFormat());
this.mDepth.setVideoMode(videoMode);
break;
}
}
} catch (Exception e) {
e.printStackTrace();
Toast.makeText(DepthReaderPoll.this, e.getMessage(), Toast.LENGTH_SHORT).show();
}
}
startDepth();
}
开启Depth
private void startDepth() {
if (this.mDepth != null) {
isRunning = true;
this.mDepth.addNewFrameListener(newFrameListener);
this.mDepth.start();
}
}
VideoStream.NewFrameListener newFrameListener = new VideoStream.NewFrameListener() {
@Override
public void onFrameReady(VideoStream videoStream) {
if (videoStream != null && isRunning) {
VideoFrameRef videoFrameRef = videoStream.readFrame();
if (videoFrameRef != null) {
depthView.update(videoFrameRef);
videoFrameRef.release();
}
}
}
};
停止Depth
private void stopDepth() {
try {
isRunning = false;
if (mDepth != null) {
mDepth.removeNewFrameListener(newFrameListener);
mDepth.stop();
}
} catch (Exception e) {
e.printStackTrace();
}
}
销毁Depth
private void destroyDepth() {
if (mDepth != null) {
mDepth.destroy();
mDepth = null;
}
}
关闭Device
public void closeDevice() {
try {
if (device != null) {
device.close();
}
} catch (Exception e) {
e.printStackTrace();
}
}
销毁SDK
public void shutDownOpenNIHelper() {
if (openNIHelper != null) {
openNIHelper.shutdown();
}
}
private void shutDownSDK(){
OpenNI.shutdown();
}
ColorReaderUVC
概述
UVC Color数据流获的方式是通过第三方库libuvc获取的,可以参考官网UVCCamera:https://github.com/saki4510t/UVCCamera。
代码概述
public class ColorReaderUVC extends Activity {
private static final String TAG = "ColorReaderUVC";
private USBMonitor usbMonitor;
private UVCHelper uvcHelper;
private boolean uvcDeviceFound = false;
private UVCCamera mUVCCamera;
private USBMonitor.UsbControlBlock usbControlBlock;
private UsbDevice mUsbDevice;
private TextureView rgbView;
private SurfaceTexture mSurfaceTexture;
@Override
protected void onCreate(Bundle savedInstanceState) {
super.onCreate(savedInstanceState);
setContentView(R.layout.activity_color_reader_uvc);
rgbView = findViewById(R.id.uvcView);
rgbView.setKeepScreenOn(true);
rgbView.setOpaque(false);
uvcHelper = new UVCHelper(getApplicationContext());
registerUsbMonitor();
}
//1.USBMonitor init
private void registerUsbMonitor() {
usbMonitor = new USBMonitor(getApplicationContext(), listener);
usbMonitor.register();
}
USBMonitor.OnDeviceConnectListener listener = new USBMonitor.OnDeviceConnectListener() {
@Override
public void onAttach(UsbDevice usbDevice) {
if (GlobalDef.isUvcDevice(usbDevice) && !uvcDeviceFound) {
uvcDeviceFound = false;
mUsbDevice = usbDevice;
//2.Request open device
uvcHelper.requestOpenDevice(usbDevice, deviceOpenListener);
}
}
@Override
public void onDettach(UsbDevice usbDevice) {
if (mUsbDevice.getVendorId() == usbDevice.getVendorId() && mUsbDevice.getProductId() == usbDevice.getProductId()) {
stopPreview();
closeDevice();
}
}
@Override
public void onConnect(UsbDevice usbDevice, USBMonitor.UsbControlBlock usbControlBlock, boolean b) {
}
@Override
public void onDisconnect(UsbDevice usbDevice, USBMonitor.UsbControlBlock usbControlBlock) {
}
@Override
public void onCancel(UsbDevice usbDevice) {
}
};
UVCHelper.UsbDeviceOpenListener deviceOpenListener = new UVCHelper.UsbDeviceOpenListener() {
@Override
public void onUsbDeviceOpened(UsbDevice usbDevice) {
openDevice(usbDevice);
}
@Override
public void onUsbDeviceOpenFailed(int i) {
}
};
/**
* Open device
*/
protected void openDevice(UsbDevice usbDevice) {
if (mUVCCamera != null) {
mUVCCamera.destroy();
}
try {
Log.d(TAG, "UsbMonitor openDevice...");
usbControlBlock = usbMonitor.openDevice(usbDevice);
} catch (Exception e) {
Log.w(TAG, e.getMessage());
usbControlBlock = null;
}
if (usbControlBlock != null) {
try {
mUVCCamera = new UVCCamera();
mUVCCamera.open(usbControlBlock);
List<Size> supportSizes = mUVCCamera.getSupportedSizeList();
if (supportSizes.size() > 0) {
for (int i = 0; i < supportSizes.size(); i++) {
Size size = supportSizes.get(i);
Log.d(TAG, "Rgb support size W * H : " + size.width + "x" + size.height);
}
}
mUVCCamera.setPreviewSize(GlobalDef.UVC_RGB_WIDTH, GlobalDef.UVC_RGB_HEIGHT, UVCCamera.FRAME_FORMAT_MJPEG);
mUVCCamera.setFrameCallback(callbackFrame, UVCCamera.PIXEL_FORMAT_YUV420SP);
startPreview();
Log.i(TAG, "Rgb Camera device open end...");
} catch (Exception e) {
Log.e(TAG, e.getMessage());
if (usbControlBlock != null) {
usbControlBlock.close();
usbControlBlock = null;
}
if (mUVCCamera != null) {
mUVCCamera.destroy();
mUVCCamera = null;
}
}
}
}
//Frame callback
IFrameCallback callbackFrame = new IFrameCallback() {
@Override
public void onFrame(ByteBuffer byteBuffer) {
}
};
/**
* Start preview
*/
public void startPreview() {
Log.d(TAG, "startPreview start...");
mSurfaceTexture = rgbView.getSurfaceTexture();
if (mSurfaceTexture == null) {
rgbView.setSurfaceTextureListener(new TextureView.SurfaceTextureListener() {
@Override
public void onSurfaceTextureAvailable(SurfaceTexture surface, int width, int height) {
Log.d(TAG, "onSurfaceTextureAvailable...");
mSurfaceTexture = surface;
if (mUVCCamera != null) {
mUVCCamera.setPreviewTexture(mSurfaceTexture);
mUVCCamera.startPreview();
Log.d(TAG, "startPreview end...");
}
}
@Override
public void onSurfaceTextureSizeChanged(SurfaceTexture surface, int width, int height) {
}
@Override
public boolean onSurfaceTextureDestroyed(SurfaceTexture surface) {
return false;
}
@Override
public void onSurfaceTextureUpdated(SurfaceTexture surface) {
}
});
} else {
if (mUVCCamera != null) {
mUVCCamera.setPreviewTexture(mSurfaceTexture);
mUVCCamera.startPreview();
Log.d(TAG, "startPreview end...");
}
}
}
/**
* Stop preview
*/
public void stopPreview() {
Log.d(TAG, "stopPreview start...");
if (mUVCCamera != null) {
mUVCCamera.stopPreview();
}
Log.d(TAG, "stopPreview end...");
}
/**
* Close device
*/
public void closeDevice() {
Log.d(TAG, "close device...");
if (usbControlBlock != null) {
usbControlBlock.close();
usbControlBlock = null;
}
if (mUVCCamera != null) {
mUVCCamera.close();
mUVCCamera.destroy();
mUVCCamera = null;
}
Log.d(TAG, "close device end...");
}
@Override
public void onBackPressed() {
stopPreview();
closeDevice();
super.onBackPressed();
}
/**
* Source destroy
*/
@Override
protected void onDestroy() {
super.onDestroy();
if (uvcHelper != null) {
uvcHelper.shutdown();
uvcHelper = null;
}
if (usbMonitor != null) {
usbMonitor.unregister();
}
}
}